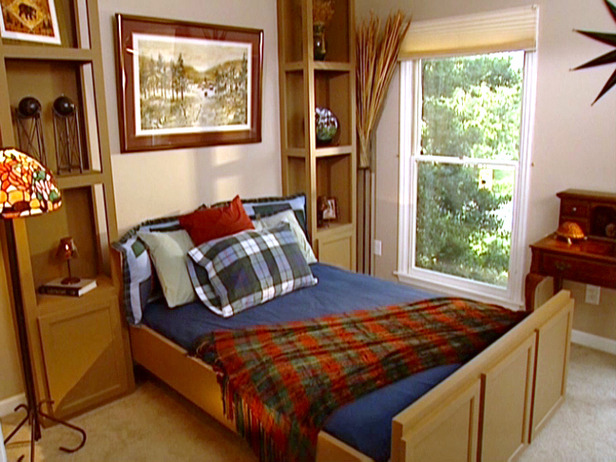
This is a DIY project I found. This is a set of instructions on how to build your own Murphy bed with inexpensive hardware found at any lumber yard. This project is inexpensive, time consuming and difficult. The hardware packages and RTA kits we sell can be fabricated and built in hours not several days.
Step 1: Cut the Wall Unit Face Frames
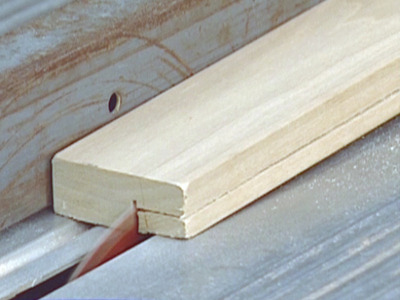
Use a table saw to rip 3/4×96″ poplar boards to 1-1/4″ finished width. You’ll need four lengths for the vertical face frame pieces and two additional lengths that will be cut into cross pieces.
Reset the saw blade to 1/2″ depth and cut a 1/2″ deep by 3/4″ wide rabbet on one back edge along the length of each piece. The plywood sides and shelves will later be glued and nailed into these rabbets.
Use a compound miter saw to cut the vertical pieces to 95″ finished length.
Cut two 1-1/4″ lengths into 10 horizontal cross pieces, each 15-1/2″. These face pieces will connect the plywood sides of each unit and help support the shelves.
Step 2: Cut the Plywood Sides and Shelves
Use a circular saw to rough-cut six plywood boards to 3/4×11-1/2″.
Reset your table saw blade depth to 1″ and finish-cut the plywood boards to 10″ width.
Use your compound miter saw or circular saw to cut four of these boards to 95″ finished length for the vertical sides.
Cut the two other 10″ wide boards into 16-1/2″ pieces for the top, bottom and shelves.
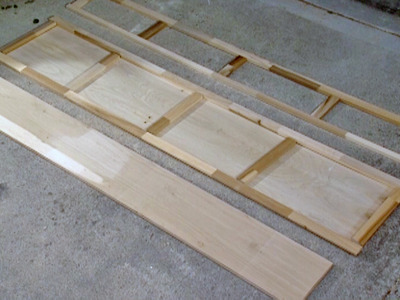
Do a dry layout to ensure that all the cut pieces (face frames, cross pieces, sides, shelves and tops and bottoms) fit together correctly.
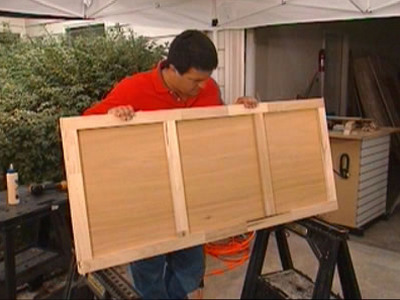
Step 3: Assemble the Face Frames
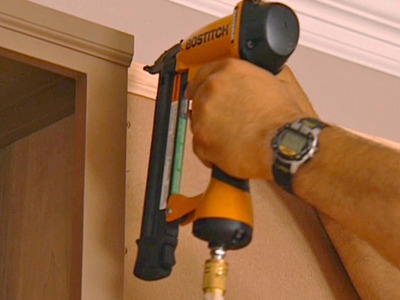
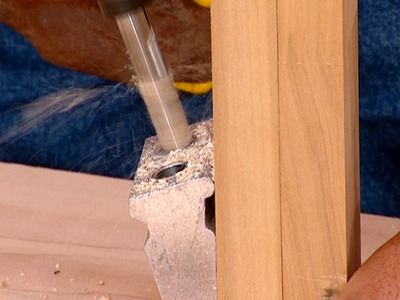
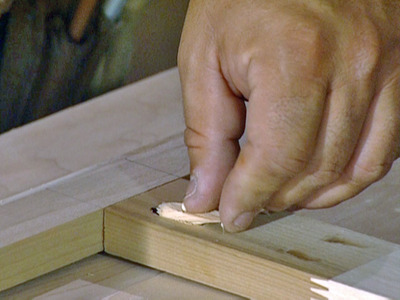
An inexpensive pocket hole jig will enable you to quickly and accurately assemble face frames using hidden screws. Use the tapered drill bit and stop collar provided with the jig. Set the stop to the proper measurement for your assembly, measure, mark and clamp the pieces together according to the jig’s directions and use the jig to drill pilot holes for the screws (Image 1).
Measure and mark the placement of the cross pieces, allowing an equal distance between each. Be sure the rabbet on the back of these pieces is at the top – the front of each shelf will rest in these cuts.
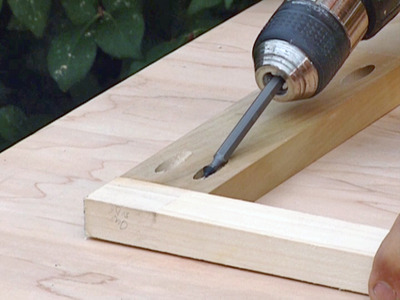
Use the pocket hole jig to drill screw holes for all intersecting face frame pieces. Remember to drill all holes on the back side, or inside face, of the frames.
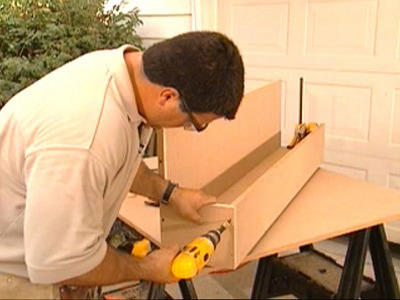
Secure the cross pieces to the vertical pieces with 1-1/4″ screws in the pre-drilled holes (Image 2).
Continue until all cross pieces have been added along the length of both face frames.
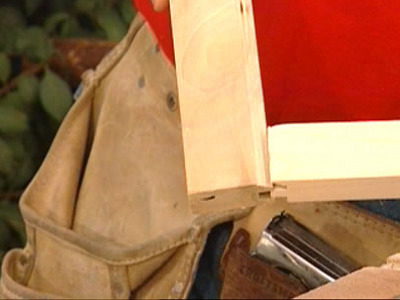
Cover the screw holes with special tapered wood plugs available with the jig (Image 3). After the screws are installed, place a drop of wood glue on each plug and use a hammer to tap the plugs into place.

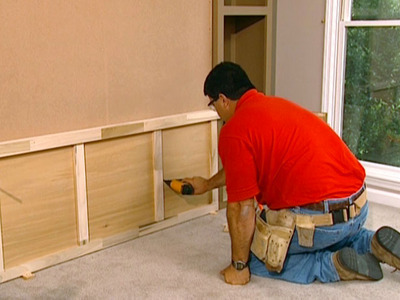
Step 4: Assemble the Wall Units
Measure the placement of the face frame cross pieces and transfer these dimensions to the vertical side pieces. Use a square to mark lines for each shelf.
Insert the plywood side pieces into the rabbets at the back of each 95″ long face frame piece. Use glue and finishing nails to secure them, then clamp the parts together until the glue dries.
Insert a shelf into each rabbet and use glue and finishing nails to secure it in place. The shelf tops should be flush with the tops of the cross pieces. Also make sure the shelves line it up with the squared marks on the vertical sides. Use finishing nails through the vertical sides to support the shelves.
Cut two pieces of 1/4″ plywood to 18″ wide by 95″ long for the shelf unit backs. Use finishing nails to attach each piece to the back of each unit.
Step 5: Build the Bed Box
Although the construction of a Murphy bed box is a simple part of the project, be sure to cut all pieces to exact dimensions – a tight fit is essential for proper operation.
Once you’ve determined the measurements for your Murphy bed, rip two 1×12″ poplar side-boards to the size needed to allow your mattress to sit slightly above the bed box.
Next, cut the shorter 1×12″ end-boards that will form the top and bottom of the bed box. In this example, the top and bottom boards each measure 54-1/2″.
With the top and bottom pieces cut, cut the 1×12″ boards that will make up the longer sides. Use a square to mark the ends before making the cuts. In this case, the side pieces are cut to 77-1/2″.
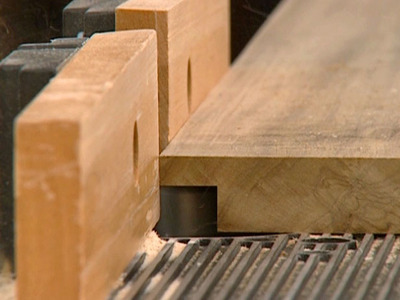
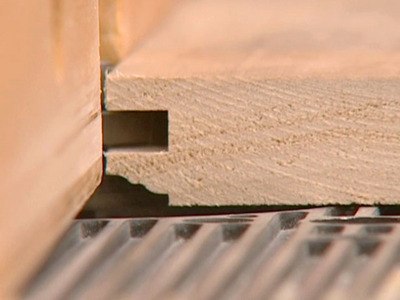
With the pieces cut, use a router to cut rabbets on the top inside edge of all boards (Image 1).
Here, the depth is set to 3/4″. On the long boards, stop the rabbets short of the ends so they are not visible at the finished corners (Image 2).
Cut the bottom board from medium density fiberboard, or MDF, which is a good choice for interior projects such as this. It takes paint well and provides a smooth surface appearance when the bed is stored away.
Finally, cut a 2×8 to create the ledger board that will connect the bed box to the wall. Here, the ledger board is cut to just under 57″ long.

Step 6: Assemble the Bed
Use glue and 2″ finish nails to assemble the sides and the end boards of the box (Image 1).
Bore pilot holes in the ends where the boards meet, then secure with 2-1/4″ wood screws (Image 2).
Repeat these steps until the sides of the entire box have been joined.
Install 6″ metal L-brackets in the corners to hold the boards in position and add reinforcement. Secure the brackets with 1″ wood screws (Image 3). To avoid splitting the boards, don’t put screws in the holes closest to the ends.
Make sure the frame is turned so that the rabbet edges of the boards are exposed. Place construction adhesive along the rabbets, then set 3/4″ MDF into the frame. Check to make sure everything is square, then bore pilot holes along the edge of the MDF every 6-8″. Secure the panel with 2-1/4″ wood screws.
Flip the frame back over and add smaller 2″ angle brackets to connect the side rails and the bottom surface (Image 4).
To attach the ledger board, first install the 6″ gate hinges to the board (Image 5), then to the bed box.
Position the bed box upright on temporary support blocks. Use shims to raise the box to the exact height and required position – in this case, aligned with the tops of the shelf units.
Attach the ledger board to the wall studs using 3″ lag bolts (Image 6).
Step 7: Cut the Bed Box Ends
With the bed box complete, place a level on the side rails and add shims underneath until the box is raised up just enough to be level.
Measure the distance between the floor and the bottom of the box. If the floor is carpeted, be sure to press the measuring tape to the floor surface for accuracy.
Use a table saw to rip MDF to the bed box width (55″ in this example). Cut the front and bottom pieces according to measurements needed.
For the two end pieces, cut the profile of the footboard using a table saw for the long cuts and a jig saw to finish. Then, use the jig saw to cut out a notch for the trim at the top of the wall.

Step 8: Install the Box Ends and Casters
Assemble the pieces, starting with the board for the back of the box. Add a support block to hold the board to the box bottom. Apply glue, then brad-nail this support in place (Image 1).
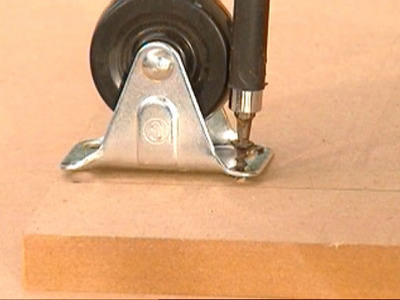
Attach casters to the underside of the bottom board. At this point, only put screws in two of the holes (Image 2).
Attach the back board with the support block to the bottom. Use clamps to secure the two boards together, then pre-drill the remaining holes for the casters. Use 2-1/2″ screws through the casters to draw the support block tight.
Add 1-1/4″ wood screws to the assembly along the edge between the casters for additional strength.
Lay the front piece down and use bar clamps to hold all three pieces together. Add 2-1/2″ screws through the caster holes and in-between to fasten the pieces securely.
At this point, a three-sided structure has been created. Place the end panels over the box end and fasten them with wood glue and brad nails.
Secure the panel with wood screws. Measure up 1-3/4″ from the bottom of the end boards and use a countersink bit to pre-drill the holes.
Turn the unit around and repeat these steps (Image 3).
Step 9: Build the Decorative End Panel
Cut four short and two long lengths of 1×2, sized to fit your installation, to frame the decorative end panel for the bed box.
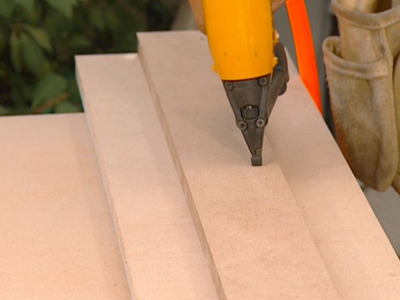
Use a router or router table with a tongue-and-groove bit to rout a groove down the center of all frame pieces.
Use the same router bit to rout a decorative profile on the face of the frame pieces (Image 1).
Re-adjust the cutter blades and form a tongue on the ends of each of the short frame pieces. Cut them two at a time to keep the ends from tearing out.
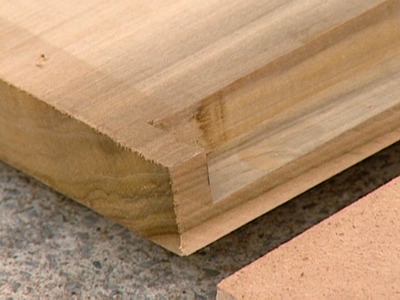
After cutting, check the fit to be sure the frame pieces mate perfectly. Also check the assembled panel’s dimensions from corner to corner. If the measurements are equal, the assembly is square (Image 2).
When you dry-fit the frames, also measure for the plywood inserts that will go into each frame.
Cut 1/4″ plywood to create three “faux” door panels for the decorative end panel. Size the plywood inserts 1/8” smaller in width and length than the dimensions of the frame grooves. This enables the plywood to “float” freely within the frames and allows for natural expansion.
Use glue to assemble the face frames. As you assemble them, insert the plywood sections but do not glue them in place. Check that the assembly is square and allow the glue to dry (Image 3).
Step 10: Assemble the Decorative End Panel and Footboard
Position the footboard under the bed box. Align the panel with the framing on the bookcases, using shims if needed. Tack the face frame to the footboard with brad nails, then remove this assembly and place it on its back.
Use 1-1/4″ screws to permanently attach the face frame to the footboard.
Re-position the footboard below the bed box.
Step 11: Apply Molding and Paint
To complete the project, install trim at the top of the bed box to match the trim on the tops of the bookcases (Image 1).
Fill the countersunk screw holes with wood putty, as well as the nail holes on the trim pieces and door panels, and the seams along the sides of the bed box.
Lightly sand the footboard and the bed box (Image 2).
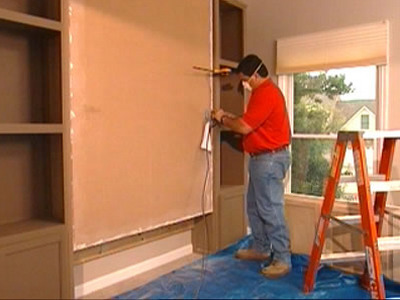
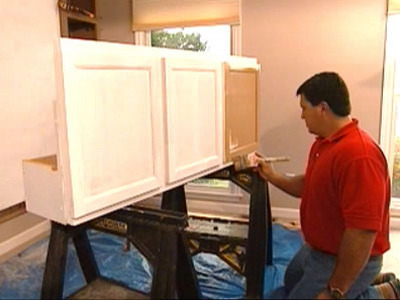
Vacuum away all dust, then prime and paint the footboard to match the bookcases (Image 3).
Paint the bed box to match the room’s walls (Image 4).
To hold the bed in an upright position when not in use, install ordinary sliding door bolts in the bookcases on both sides of the bed. Place the bolts underneath the shelves so they are completely out of sight. Mark holes for the bolts and drill through the bookcases into the bed box. Use screws to mount the bolts in place.